


Easy Black Cat Paper Craft for Kids - A Simple & Fun Halloween Craft for Little Hands 🐾
We love simple, creative crafts here at Schoolhouse Sprouts, and nothing beats the magic of paper crafts! This adorable Black Cat Paper Craft is easy to make, quick to prepare, and perfect for Halloween—or anytime your kids want to get crafty with a cute cat theme.
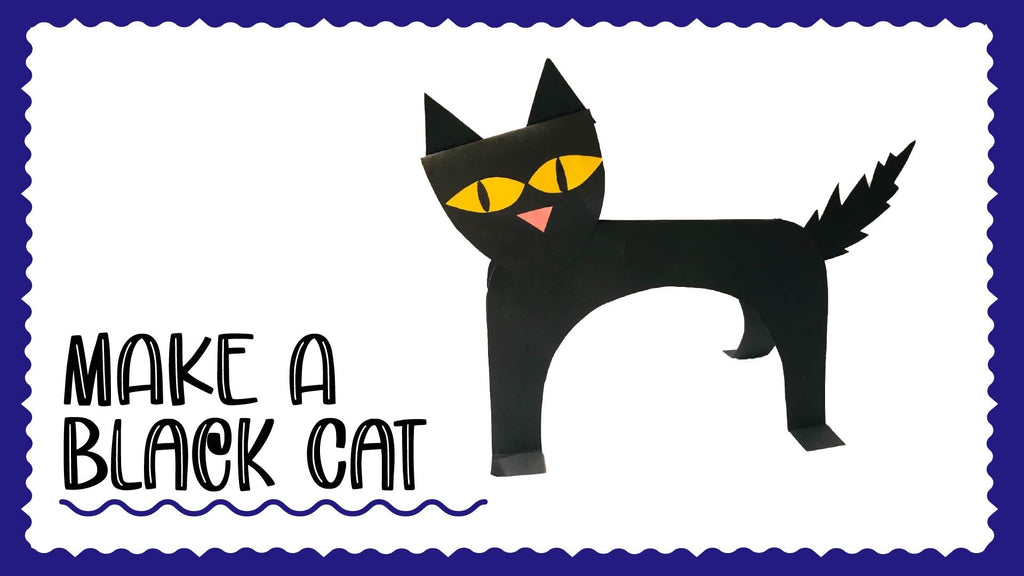
With just a few basic supplies, your little one can create their own standing paper cat. It’s spooky, silly, and so much fun to make more than one!
🎥 Watch the Video Tutorial
Want to see how it’s done? Watch our full Black Cat Paper Craft video below and craft along with us!
📺 Watch it here:
👉 Black Cat Paper Craft for Kids | Schoolhouse Sprouts on YouTube
Our videos make learning and crafting fun, interactive, and easy to follow—perfect for kids at home or in the classroom.
 ✂️ What You’ll Need:
💡 If you’re using thinner printer paper, glue your cat onto a sturdier base (like cardstock) so it stands up on its own.
🐈 Let’s Make a Black Cat Paper Craft!
 Step 1: Fold Paper
Fold your black paper in half—this will help the cat’s body stand on its own when finished.
 Step 2: Cut the Cat’s Body
Cut a large “U” shape from the folded edge to form the cat’s body. You can round the sides or trim the top for a smoother look.
 Step 3: Add the Legs
Fold small flaps at the bottom of the cat’s body to create legs. These folds will help your cat stand tall and sturdy once it’s complete.
 Step 4: Cut an Oval for the Head and Fold It in Half
Cut out an oval shape for the cat’s head and gently fold it in half to give it some dimension.
 Step 5: Cut Out Eyes and Nose
Use yellow paper for the eyes and pink paper for the nose. Glue them to the face and draw in the pupils, whiskers, and a smile with your black marker.
 Step 6: Cut Ears and Glue
Cut two small triangles for ears and glue them to the top of the head.
 Step 7: Cut Out the Tail
Use leftover black paper to cut a long strip for the tail. You can make it straight, curly, or zigzagged for a spooky Halloween look.
 Step 8: Glue On the Head and Tail
Glue the cat’s head to the top of the body, then attach the tail to the back. Make sure to press gently so it all sticks securely.
Now your adorable black cat is ready to show off!
🌟 Craft Variations
Get creative! You can make:
This craft helps kids strengthen fine motor skills, practice cutting and gluing, and express their creativity while celebrating Halloween fun.
🎃 Make & Learn with Schoolhouse Sprouts
Looking for more fun Halloween ideas?
📺 Subscribe to our Schoolhouse Sprouts YouTube channel for more craft tutorials, songs, and learning fun—perfect for kids at home or on the go!
We post simple, engaging activities to help kids learn and grow all year round.


